The Glacial Crown of the Continent
I did an independent study on cartographic design my final undergraduate semester. With the help of photoshop expert Tanya Andersen and photoshop/blender expert Daniel Huffman, I became comfortable in blender and photoshop. Even more, I went beyond their tips and tricks and challenged myself to follow some tutorials online to get the ice effect to how I wanted it to be. In return, I gained confidence and proficiency in my blender and photoshop abilities. I cannot recommend Daniel's tutorials including the blender tutorial enough.
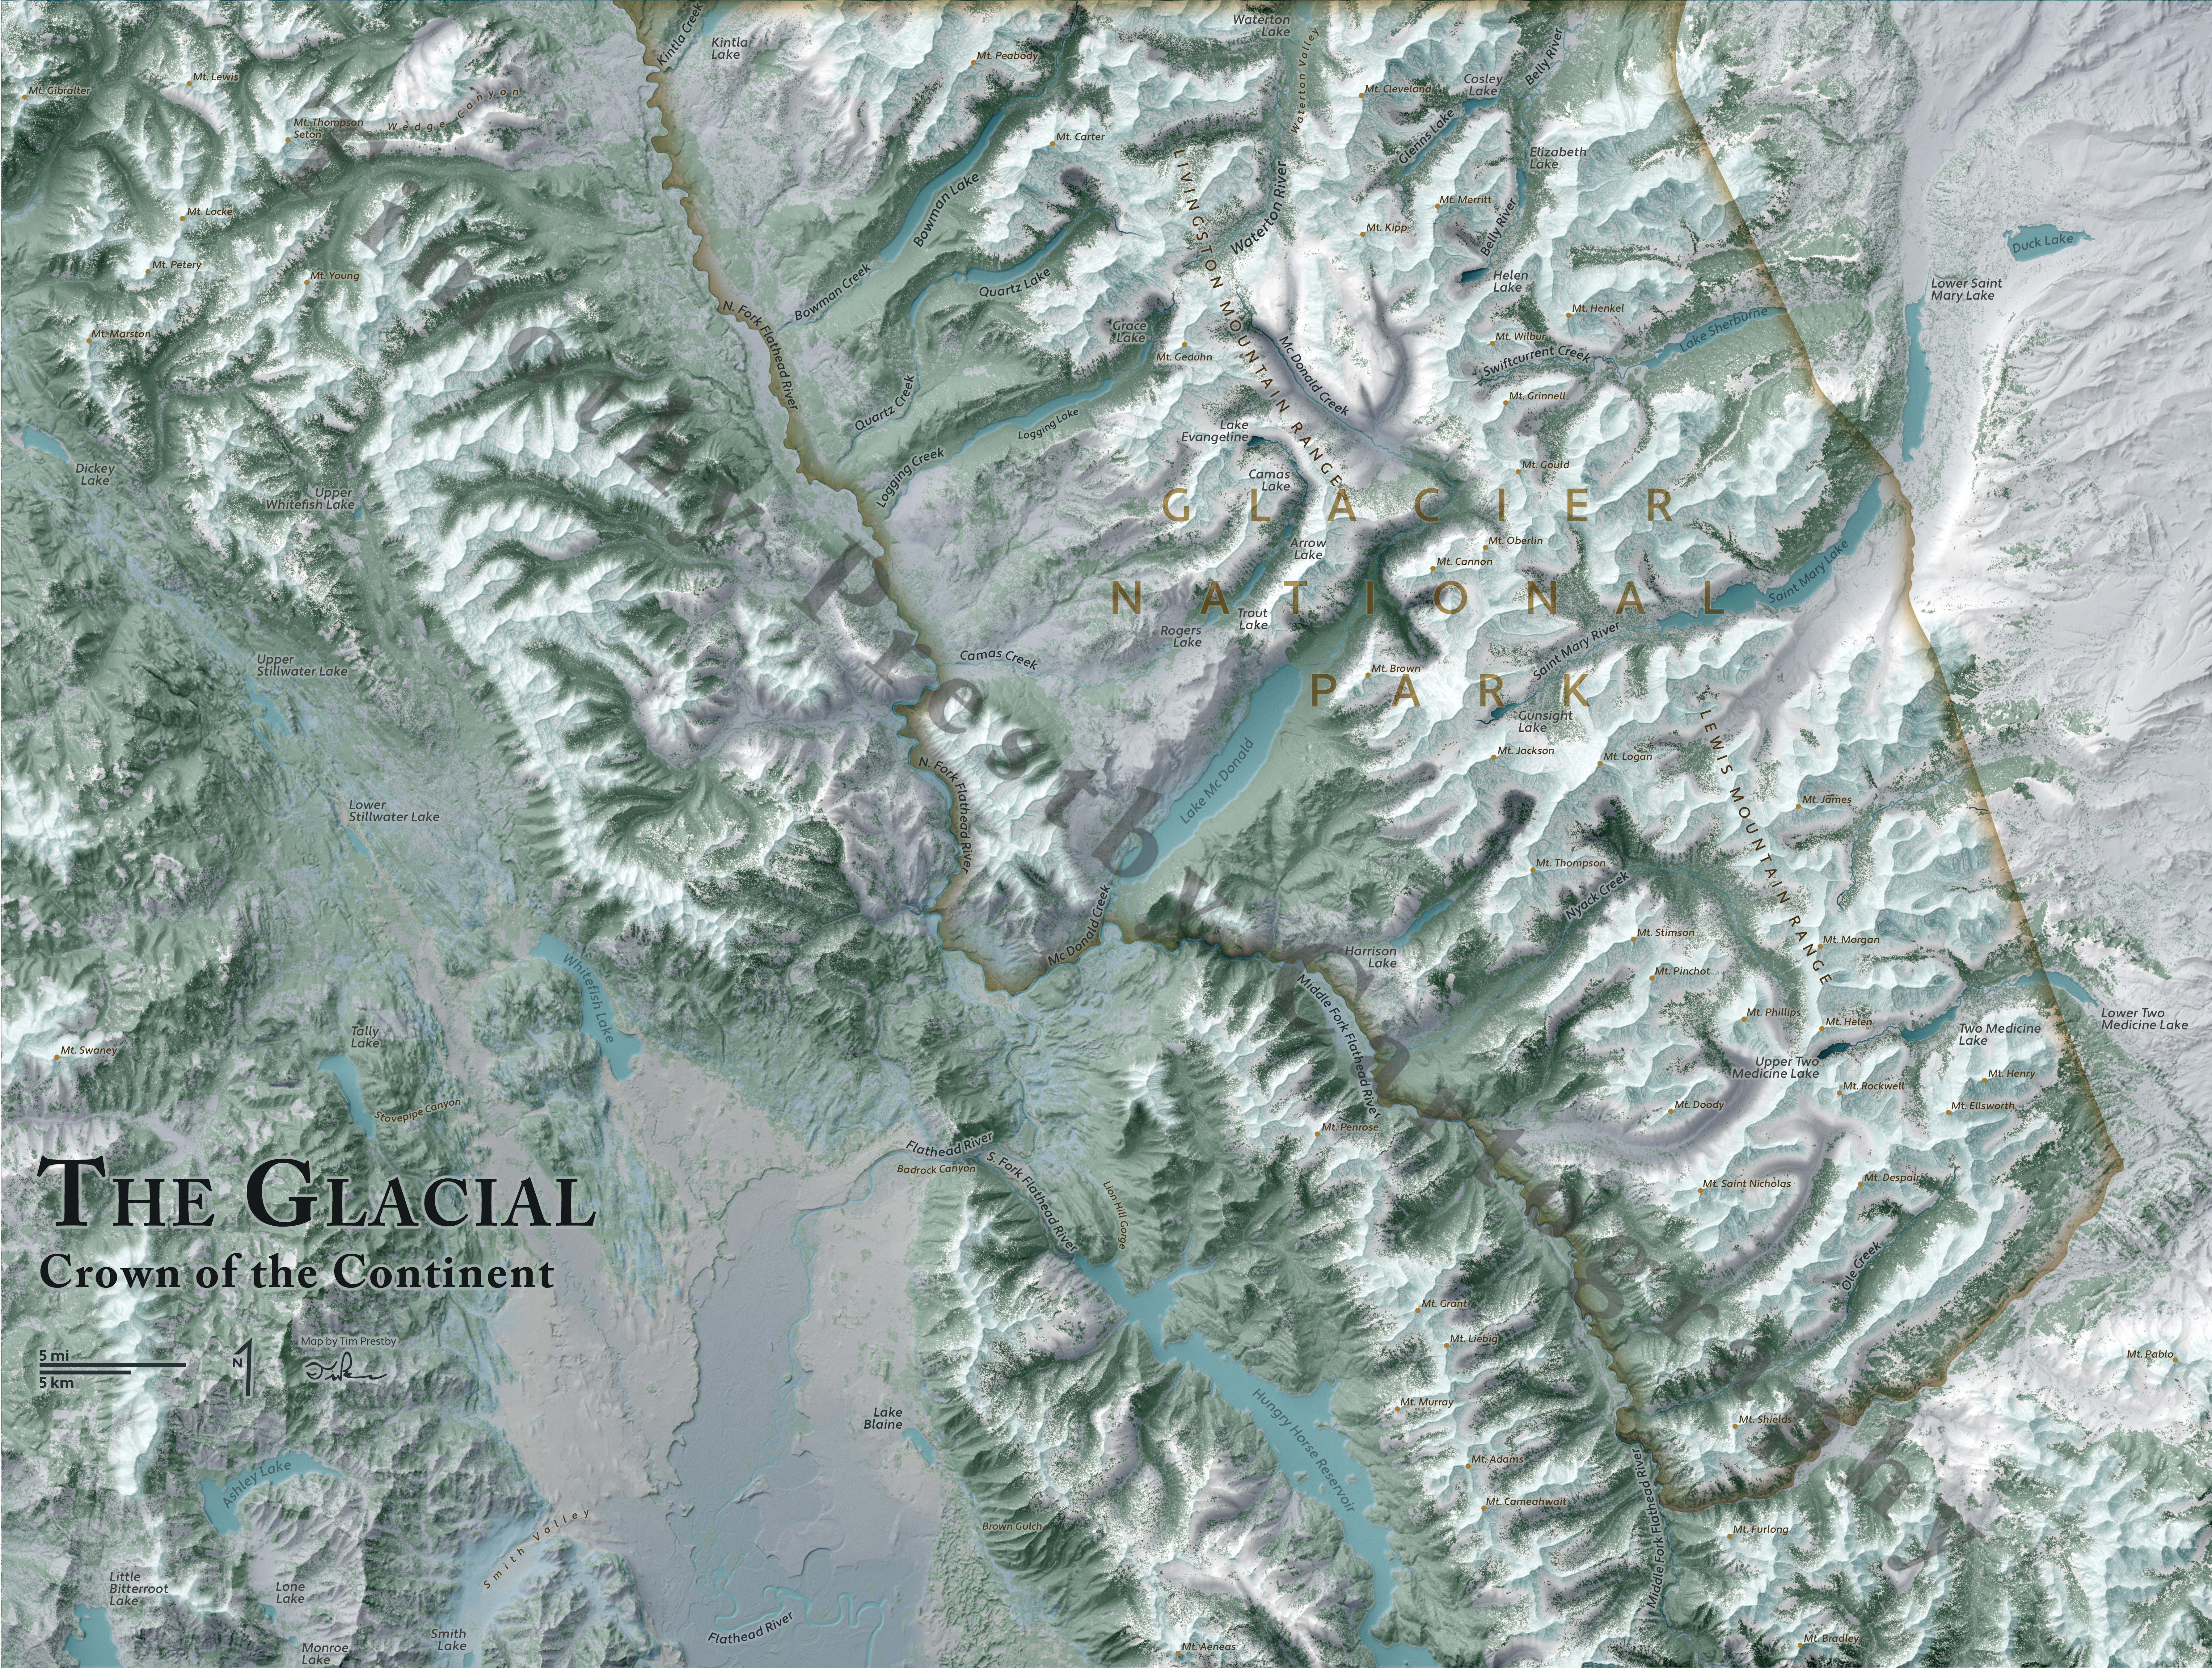
I went into the map knowing that I wanted to do something similar to Daniel Coe’s beautiful map Glacial Landforms of the Puget Lowland showcased in the NACIS’s Atlas of Design. After hours of getting inspired by varying natural landscapes, I decided on the lower part of the Crown of the Continent, an area of over one million acres of preserved wilderness that many know as Glacier National Park. I chose this area because the park is being rapidly transformed by climate change. So, I set out to create an idealized version of the area that was still rich in ice. I utilized ArcGIS Pro to prepare tree canopy, DEM, and landcover layers for further use. I brought the DEM into Blender and manipulated the program to produce a stunning hillshade. Then, I brought the hillshade into photoshop for some touch ups. I manipulated the levels on the shadowed and lighted areas to make the terrain pop. The tree canopy layer came with some dissolve effects to mimic individual trees showing. Now came the especially fun part creating the icy glaciers. Using the magic wand, I selected the highest elevation areas and created a new layer just containing areas of the hillshade with the high points. With this layer, I applied plastic wrap and glass effects to give the land a frost-like appearance. Once the glacier layer was added, I began to experiment with a gradient color ramp. I ended up with seven different color stops that ranged from blues to grays to greens that varied based on the elevation. Finally, I brought the labels into photoshop and gave them halos with differential strengths depending on the darkness of the background. As a whole, this project taught me the ins and outs of working in a production setting as I met frequently with my advisers and had weekly progress targets to hit.
Honorable Mention: 2020 CaGIS Arthur Robinson Award
Created using Photoshop and Blender